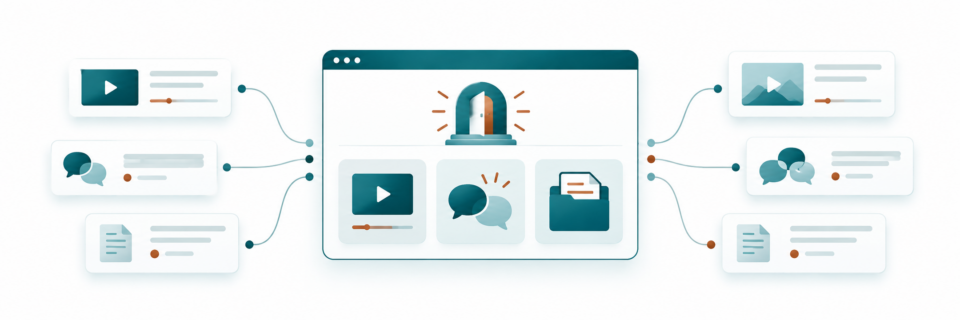
Your clients may already have everything they need: a course, a discussion group, useful documents, and access to you. The trouble starts when they can’t remember where any of it lives. Another email with another link helps for a day, but a clear client portal gives those resources a home they can return to.
The GoHighLevel Client Portal brings customer-facing resources into a shared environment. In this guide, I combine my walkthrough of the redesigned portal with practical lessons from my Communities tutorial. The goal is to help you organize the experience around what clients need to do next, whether that is continuing a course, asking a question, or finding a shared file.
What You’ll Learn About the GoHighLevel Client Portal
- How the portal, courses, and communities fit together.
- Which navigation and access decisions to make before inviting clients.
- How invitations and magic links support onboarding.
- What to test when adopting the redesigned portal.
Want a connected system with practical setup guidance and ongoing support? Explore Marketecs Engine and the support included.
Video Time Stamps
- 00:00 Why Client Portal accessibility matters
- 00:49 The existing HighLevel membership experience
- 01:15 Tour of the previous Client Portal layout
- 03:22 Previewing the redesigned Client Portal
- 04:47 New Community features and customization
- 05:44 Two ways to work with Marketecs
- 07:05 Tour of the new Communities layout
- 08:18 Unified navigation and appointments
- 09:11 Pinned communities and continued learning
- 09:40 What to test before enabling the update
- 10:08 Do you need to migrate or rebuild anything?
- 10:34 How to pin a community
- 11:10 Final thoughts and customer communication
How the GHL Client Portal, Courses, and Communities Fit Together
Think of the portal as the client’s entry point. Courses provide structured learning. Communities provide discussions, channels, and events. Shared files and other enabled applications support the relationship around those activities.
Since clients may encounter a course through the portal’s course area and through a community’s Learning tab, the distinction is important to note. Both can be useful, but your instructions should make the recommended route obvious.
In the older layout, I received questions about multiple Home buttons and different routes to learning content. The redesign makes the experience more consistent. HighLevel’s unified portal documentation describes shared navigation across the dashboard, courses, communities, billing, and files. It also identifies course continuation and pinned communities as ways to help members find their place.
The practical benefit depends on how you organize your material. A tidy interface still needs useful names, clear access rules, and a reason for clients to return.
Plan Your Client Portal Around the Client Experience
Before adjusting settings, list the recurring requests your team answers. Where is the replay? How do I join office hours? Where should I ask a question? Where is my worksheet?
Use those questions to decide what belongs in the portal. For a consulting program, that might mean an onboarding course, a support community, recurring group sessions, and reference documents. A training business may need a clearer course sequence and a discussion channel for each program.
At Marketecs, I demonstrate a real community containing onboarding guidance, tutorials, and weekly office hours. Those resources support the same customer relationship. Putting them together gives members a repeatable place to look.
You do not need a large course library to make this useful. Start with the resources you already provide and the questions you already answer. For the broader setup process, use our guide to GoHighLevel Community Groups.
How to Organize GoHighLevel Communities and Portal Navigation
In the portal update, I show the reorganized community settings, tab controls, and channel sections. Use that control to support a recognizable route through your content.
Create Clear Community Channels
An Announcements channel can hold official updates. A Support channel can tell members where to ask questions. Learning can hold the courses attached to that community. We recommend you avoid creating several nearly identical places to post the same question.
When a community grows, channel sections can help group related discussions. Start with a small number of purposeful channels and add more when the content justifies them.
Help Clients Find Their Courses and Communities
The redesigned dashboard includes pinned communities and a way to resume learning. In the video, I show where I found the community pin option and then return to the dashboard to confirm it appears. Include that small action in your orientation. A short demonstration of where to click next is often more useful than a tour of every available setting.
Understand Client Portal Permissions and Course Access
Decide which applications clients should see, then decide who can access each course, group, or private area. These are related decisions with different scopes.
HighLevel’s App Permissions guidance explains that application visibility is configured for the sub-account’s portal. Turning off an application hides that area for contacts in that portal; it does not delete the underlying content.
Within a community, the older tutorial demonstrates different ways to make courses available: to all members, through a purchase, after a time delay, or through a private channel. Choose the arrangement that matches what you sold, and test it using the appropriate member account.
Also review the logged-out experience. In my private community example, visitors see the About page and selected public links, while members see additional resources. That public page needs to explain what the group is and how someone gains access.
Make Client Portal Invitations and Login Help Part of Onboarding
An invitation sent is not the same as a client successfully joining. The portal dashboard distinguishes invited users from joined users and provides invitation, login-email, and magic-link actions.
Build a simple onboarding sequence: grant the intended access, send the invitation, explain where to begin, and check whether the client joined. Give your team a consistent way to help when someone cannot sign in.
Update: HighLevel’s dashboard documentation, updated September 25, 2026, says dashboard-generated magic links expire after 15 minutes. Generate a fresh link for immediate assistance. For automated emails, use the supported workflow custom values rather than pasting a manually generated link into a reusable template.
A magic link helps the intended contact sign in but does not grant a course or community entitlement. Check that access first, especially when a client can enter the portal but cannot see the resource they expected.
What to Test Before Enabling the New GoHighLevel Client Portal
The above video shows a preview and a rollout choice. Check the controls available in your account now; HighLevel’s current documentation directs users to the Client Portal Dashboard to enable the unified experience.
The redesign carries existing community content forward without requiring a manual rebuild. I still recommend testing anything clients use regularly, particularly custom code or styling.
- Sign in as a representative member and follow the route from the invitation to the first resource.
- Open a course, continue a lesson, and return to the community.
- Check private areas and shared resources with the intended permissions.
- Review the logged-out view and repeat the key tasks on a phone.
- Prepare a short message showing members what changed and where to get help.
Appointment availability needs an account check. The video previews an Appointments area, while the unified portal help article still lists appointments among upcoming capabilities. Confirm the feature in your own account before promising portal appointment access to clients. Existing community events are a separate part of the experience.
Supporting Tutorial: Communities, Invitations, and Portal Settings
The tutorial below provides the underlying setup context, including community access, events, a real Marketecs example, and portal invitations. The interface predates the redesign. Use it for the process and decisions, alongside the newer walkthrough above.
Video Time Stamps
- 00:00 Introduction: Why Build Communities in GoHighLevel
- 02:13 Navigating the HighLevel Interface
- 03:18 Creating & Customizing Your Community
- 05:31 Exploring Community Features (Discussions, Channels, Branding)
- 07:50 How to post forum content in High Level Communities
- 09:44 Introducing Private Channels
- 10:29 NEW Go Live Feature in High Level communities
- 11:26 Integrating Courses and Events
- 14:58 How to Create Events in a High Level community
- 18:10 Advanced Community Settings (Private Channels, Access, Levels)
- 19:22 Newer Community Digest or Group Newsletter settings
- 22:06 Adding promotional or informational links to your groups
- 24:06 Client Portal & Additional Settings
- 26:48 Real Community Example: Marketecs Affiliate Hub
- 29:03 What Communities look like when not signed in
- 30:28 Managing Client Portals, Invitations & Magic Links
- 33:47 Final Thoughts & Use Case Ideas
GoHighLevel Client Portal FAQs
Do I need a community to use the client portal in GoHighLevel?
No. A community is one application within the portal. Your portal can support the relevant enabled applications, such as courses and shared files, according to your setup and client access.
Do I need to rebuild courses and communities for the HighLevel Portal redesign?
The unified experience carries existing content forward. Review custom code, styling, and the client journey before enabling it, and test the functions your clients use most.
Why can a client log in to the client portal but not see a course?
Login and content access are separate. Check the contact’s course or group access, any private-channel requirements, and the portal’s application settings. A magic link does not add missing permissions.
Can I save one magic link and reuse it for every client?
No. Magic links are contact-specific, and dashboard-generated links currently expire after 15 minutes. Use the supported workflow values for automated messages and a fresh link when helping an individual client.
Key Takeaways on Creating a GoHighLevel Client Portal
A useful client portal connects your resources to a clear client journey. Decide what members need, organize the route, test access, and explain the next step. That is what turns a collection of materials into a system your clients and team can use.
Read the full transcript: Client Portal Update
The Client Access Problem
If you provide digital content, you know the importance of accessibility and ease of accessibility. You may have online courses in one place, communities and discussions in another, documents in yet another, and then maybe even an affiliate portal, in which case many of your customers have probably felt like there was too many places to sign in and too many things to deal with. Well, I have a platform that is now solving that problem, and they just made it even better. I’m Kathrine Farris, owner of Marketecs and Marketecs Engine.
In this video, I’m showing you the new upgrades to the HighLevel client portal, what it looks like, the improvements, and what you should double check before you enable it. So, let’s dive in and take a look.
Touring the Original Portal
All right, here we are inside of Marketecs Engine which is our version of HighLevel and we are in a demo account and what I want to show you is what’s located here under memberships. So under memberships you have your client portal, you have courses, you have communities, there’s also credentials and there’s a whole marketplace for GoKollab. Now, traditionally, even within HighLevel, there was some pieces of this whole membership section that felt a little disjointed, even though it was all still in one place.
So, here’s what it looked like in the past when you would come to your client portal. So, you would have the option for a recently opened group. You could go view all groups. You could take a look at any courses and continue, or you could choose to take a new course. But you can see how this isn’t very I don’t know it’s not very inviting looking. It is minimal at best. You have communities and courses here. And as someone who’s building the community, you could actually turn on a few more features.
You could connect documents here. You could also connect your affiliate links and portal and information here. And they would basically just be on the side as well. So, if I go into a group here, you’ll notice that this looks fairly similar to some other platforms. You’ve got discussion, learning, events, leaderboard, members, and about. And you have all your settings here where you can adjust how your group looks and the different features within it. You can make posts, you can go live, you can add different channels.
In this case, we have two channels here. So, this is all very usable. And if you go under learning, you’re actually going to see your courses here. You can also go back and look at courses this way, which that piece felt a little confusing to people as to why do I have a my courses section, but then I also have learning within my communities. And that could be an internal choice. And there’s a few other things that go into that. Then we have these two home buttons, which I got many, many questions about over the last few years.
You know, why do I have multiple home buttons? Can we turn one of those off? and it was like, oh, that part’s not customizable. So, taking a look at where we’ve been in HighLevel, you can see that all the features and functions are here. Things worked, but there was definitely room for improvement.
Previewing the Redesigned Portal
Well, what I’m very happy to say is that HighLevel is delivering on that improvement. So, here we have the new layout for the client portal that is much more integrated amongst the communities and the learning features. Now, when you first enable this, or actually even before you enable this, you’re going to have the opportunity to look at it in a preview mode. So, what I want to do is I’m actually going to go back here. I’m going to click memberships again because I didn’t do this last time.
And you can see that the next time you click memberships, if you have this new redesign enabled, and it is coming out in a few days from the time of the release of this video. But if for some reason you’re not seeing it, you may have to go check labs or if you’re not an agency owner, you may actually have to ask your agency owner to turn it on in labs for your sub account. But if it’s turned on, if this new redesign of the client portal is turned on, then you’re going to see this option here.
You’re going to be able to open it in a preview and you’re going to be able to choose when you want to roll it out to your community. You can even say maybe later. So, what I’m looking at here is the preview. And you can even see in the blue back there, there’s a preview notice. And one of the reasons I wanted to come in here and actually show you step by step what you’re going to see when you enable this, when you preview this, and how it’s all going to look so that you’ll understand.
Community Tabs and New Features
The first thing it’s going to do is it’s going to run you through all the new changes. It has this nice little popup. It’s going to tell you how you can rearrange your community tabs. And that’s the tabs across the top here. You’re now going to have control over the order in which those tabs show up. You can even turn some of them off. And the settings has moved a little bit. So settings, community tabs is one thing. Under discussion, you can create a post that we were able to do before as well, but you now have polls.
Polls are new in your community. So that’s exciting. And then you can do voice messages in chat. So again, under discussion, you can do a chat message editor. We’ve got membership questions with custom fields. So, we’ve always had membership questions, or at least for as long as I’ve been building communities. Now, you can actually put custom fields in your membership questions. And then channel sections where you can actually group your channels, give it more organization. You can group your channels together instead of just having a long list.
And I can think of many ways where that would be useful.
Working With Marketecs: Offers at Publication
I’m interrupting this video to make sure that there is no confusion about HighLevel or about how to work with me. If you want to try HighLevel but don’t want to waste months trying to figure it out, I have two very clear options for you to consider. If you’re looking to build an agency or a SaaS business, head over to Marketecs.com/highlevel. By using our affiliate link, which costs you nothing, you will get the following bonuses. Our Marketecs Engine core snapshot. This is all of the features that we install in every new Marketecs Engine user account, and we’re giving it to you for free as an affiliate.
Our onboarding guides and access to our private community. An invitation to join our weekly live office hours where I personally will answer questions and even share tips that I’ve learned throughout the week. and I’m constantly learning. There is so many new features and things to learn in this industry as a whole, not to mention within the HighLevel platform. Plus, we’ll give you our additional templates, checklists, and migration guide. That’s option number one. Option two is if you are a business owner just looking to improve your own tech stack, and you don’t want to do it alone.
You would like a trusted strategic partner in your corner that speaks the language, brings you time-tested automations, proven strategies, and up-to-date learning. Then go to MarketecsEngine.com and book a consultation with me to learn more about our HighLevel agency Marketecs Engine and joining our ecosystem. I am also currently offering discounts on one-on-one consulting to any of our affiliates and HighLevel user. So whether you’re building an agency or building a business, pick your path and let’s drive results. Now back to your regularly scheduled programming.
The Redesigned Community Experience
All right. So that little popup will come up for you. You’ll be able to read all the details about the little nuances of these changes and things. But you can see here, this is now what the community looks like inside of the customer portal. So you can see that there’s a couple of links here. You can invite members. The leaderboard is right there. But my settings are not over here anymore. My settings are now up here. And as we saw in that little popup, there’s a few new things in settings that you’ll want to take a look at.
Again, it’s even it’s even pointing you in the right direction. It’s telling you, hey, look, this is new. So, you’ll want to pay attention to those things and really scan through and see what you’ve got going on. Under learning, this looks very similar. This isn’t looking extremely different. Under events, again, very similar, but now you have a small calendar with your list. And I’ll go back to the demo group over here and show you the difference. See, not extremely different, but there is a little shift in how this looks.
I definitely like it. It’s cleaner. If you choose to leave the leaderboard on, that’s still there. Members and about. All right. And if we look at the old version here under discussions, you really just saw this demo group. If you had more than one group, you would switch between them.
Dashboard Navigation, Courses, and Appointments
Here in the new layout, I now have the option to go back to what they’re calling the dashboard, which is like the portal home. I am in my communities right now. I can go to courses from here. And now I can go to appointments. This is another new feature that they’re building into the portal. So, you’ll be able to give anyone in your community access to special appointment types. Now, that’s a big benefit and an add-on to me, but that is a new feature that was not in the previous one.
Communities and courses, they’ve been there for a while, but look at how this looks in comparison to how it looked in the other one. I think this is much cleaner, much more attractive. If I go to the portal, this is replacing that customer dashboard that we had over here when we went home. So, this is the old view. This is the new view. And you can pin communities if people have more than one community that they’re in and you want to have a specific one in there.
You can pin your communities. You can also see an overview of how many posts and courses you have. And you can pick up where you left off in learning. But again, you just have this easy navigation over to the side where I don’t know, before it just felt a little clunkier. This feels a lot more intuitive.
Testing and Communicating the Update
Now, the big deal about this is that if you’re already using HighLevel, if you’re building courses and you have an online community, this is going to look different for your customers. So, you do need to research, look at the navigation, and be prepared to ask questions and answer questions for your community. If there’s something particular that you use over and over again, make sure you get in and test it with this new layout. Make sure that you’re happy with the way this looks before you flip the switch and turn this on for your community.
But the great news about this upgrade, about these changes, is that there’s really little for you to do other than poke around and do a little research on it. You do not have to migrate anything. You do not have to fix anything unless you had a lot of customization before. then you’ll just want to check your custom codes and things. But outside of that, this is really just an upgrade. It looks cleaner. The interaction is better.
Pinning a Community and Closing Thoughts
The one thing about pinned communities that I would say is if you go into communities and you go into your group, this is where I found to just pin a community was right here. Now, if I go back to the dashboard, you’ll see that it’s in my pinned communities. So, that might be the one little thing that I would say you could demo for people. And as you add appointments, that gives you something to actually announce in your community. Hey, go check out the newly revamped client portal.
And by the way, we have some special appointment offers for you now. Or this is the way that you can navigate easier. If nothing else, I think this gives everybody some bonus content to provide to their communities, a great new layout, and it’s really an upleveling for the HighLevel communities overall. I hope you feel the same way. I hope you enjoy it. If you have any questions, drop them down in the chat. I would love to answer anything that I can.
If there’s a particular part that you’re excited about, let me know what that is, too. And I also hope that you will like and subscribe. Thanks.
Read the full transcript: Communities Tutorial
Why Build a Community?
Today we’re going to talk about communities or memberships or groups, whatever you would like to call them, within GoHighLevel or GHL or HighLevel, whatever you call it. Building a community around your business has become a pretty highly rated request for a lot of our clients. A lot of coaches, consultants, and service providers want to be able to provide that extra level of support for those that are working with them. Maybe it’s ongoing event support. Maybe it’s a forum for asking open-ended questions and getting support.
In our case, we have a community around Marketecs Engine so that if you have questions or we want to share information with you, it’s that much easier for us to do that with anyone that’s simply in that membership, in that group, in that community. And when I think about the communities inside of HighLevel, I really think of this as almost a bonus feature within the system. When you think of everything else that HighLevel does, the email marketing, the social media marketing, contracts, all the workflow capabilities, to think that I can also build online courses and build online communities all within the same system and then I can have different triggers and different actions within workflows that build upon those things. again, all in one place.
It really feels like a bonus. So, with that said, I hope you take this video in terms of seeing what the communities inside of HighLevel can do and helping to determine whether this is going to meet the needs of the community that you are looking to build. There are lots of community platforms out there and different ones are going to have different features, 100%. So, if you’re looking for something very specific, hopefully I will hit upon it today. Or maybe you’ll discover that this system has 90% of what you’re looking for and the added integration pieces with the rest of your CRM just make it worth giving up that 10%.
Which I can understand. So, there’s a bigger picture view here when you’re looking at whether the HighLevel communities are going to work for you or not. So let’s dive in and take a look at how to build a community as well as the features within the communities.
Creating and Branding a Community
Here we are inside of HighLevel, better yet our version called Marketecs Engine. And we are in a demo account. So some of our URLs aren’t going to be connected and you’re going to see that it’s kind of bare bones in here and that’s on purpose. So when you first come over to the left-hand menu, you’re actually going to click on memberships. Memberships currently covers everything within the client portal. Courses, communities, credentials, they’re all covered under this membership section. We covered courses in a previous video.
We discussed how to build out a course as a product. And so today, I want to take a look at communities. And actually, these two things interact. You can put your courses within a community as well. So I am going to cover that too. So, if we go over to communities, you will see that I don’t currently have anything set up. And again, these words can be a little bit interchangeable. Some people will call their community a membership and some people will call it a group.
Some people will call it a community. When you come into communities, you can see that it’s asking you to create a group. So, the language probably just adopt whatever you want to call yours and run with it. So, I’m going to click create a community. And now I have to fill out some basic information. So, group name, we’re just going to do test for now. And the URL, it will prefill basically what you put in for the name, but you can edit that.
And then you would put in a brief description. All right. You can upload all of your branding elements. So, your favicon, and it gives you the little dimensions here, 16 x 16, 200 x 200, 200 by 200. So, you’ve got your cover image, your favicon, and your logo. I’ll upload a couple things here and try to make them all a little bit different so that you can see where those show up. All right. So you can see here that 1:1 ratio.
I uploaded these gears and that’s where the favicon’s going to go. On the cover image, I actually did upload one with some text on it here. Very different from the gears. And this is your standard like PowerPoint slide or YouTube thumbnail size. Then for the logo, again, 1:1 ratio, similar to a favicon, which is actually what’s my what mine is called, but that’s okay. And so you should be able to see where these different items are going to show up. and we’re going to create group.
Member Signup and Profiles
All right. So, when you create a group, you’re actually going to sign into this group. This could be the same as your HighLevel password or this could be something different. But this is the next step is you’re actually going to create your password for you signing in and creating your user account in the group. After I put my password in, the next step is it takes me over to complete my profile. And this is one thing. You do have to add a photo and your bio is optional, but everyone that signs into your group or your community has to go through this step.
While in some ways I kind of wish they would take this step away that I didn’t have to add a picture, in another way it does enable you to see who’s actually signed in before because you can see who has a picture and who doesn’t. All right. So, I uploaded a picture and then I can choose how I want to zoom in and I can drag and drop to crop it a little bit if it was a different picture, but it was already square.
And I’m just going to put in my bio so you can see where it shows up as well. All right, I click complete and then I’m going to be taken into the group. Okay, this is base level. This is what’s created by just adding those three pieces of information and a couple of images. And if we take a little tour here of the group, first of all, you can see my favicon, which was the little gears, shows up up here. You can see my logo shows up over here.
And you can see the image that I said had all the text on it, shows up over here. So, this is where those three images pop up. And you can see the name of my group is right here. It’s also up in the top here.
Community Navigation and Features
On the home screen, you’re going to see typically it’s going to bring you into discussions first and it’s going to give you the full rundown of anything that’s been posted in a channel. And then if you go across the top, you’re going to have learning. This is where we can connect our courses like I was mentioning. Then you’re going to have events. You can make recurring events, one-time events. You can even charge money for your events when you add them in here.
So maybe it’s a free event for members or maybe you have different membership levels or different community levels and some are paid, some are free and they get access to additional events. Your leaderboard is going to be different activity levels. Right now these are really set up to having to do with how many likes you get. Here we go. Likes on your post and comments determines the different level settings. I don’t actually use this too much right now. I guess it’s interesting just to see who’s getting more likes and that sort of thing, but I’m hoping this will get a lot more customization in the future.
The rewards are really just you saying what would you like to give someone when they hit a certain level and then you still have to do that, take that action. You can build some pieces of this, some components of this gamification and reward system out in your automations like send an email when somebody hits a certain level with a discount code or something like that. but it’s not as robust as it could be. Then you are going to get your members list and you’re going to be able to see active admins, contributors, requests.
If you have your group locked down where people can’t automatically get in, then you’re going to see that. And of course, anyone who’s been banned. Then you’re also going to have your about section. And this comes into play especially if your group is locked down or pay-to-play kind of situation. This is the page that people are going to be brought to when they don’t have access. And we’ll go over that a little bit and I’ll show you an example of what it looks like when somebody’s logged out versus logged in as well.
Posts, Channels, and Private Access
If we go back to our discussions and you’ll notice a side panel here didn’t really change and these are our channels. So if we click on announcements, this is a particular channel and you can put in post. So you give it a title and then you put in your content. You can also add GIFs and images and videos. One of the things I like about the videos is you can upload them directly or you can actually put a YouTube link that plays right here in the community.
It does not take them out to YouTube. I actually like that feature where it keeps them right here when you do that. Um, you can add links and attachments and put in emojis and hashtags or channels or all that kind of stuff. The other thing you can do with the @ symbol is you can actually tag people that are within your community and depending on your notification settings will depend on whether people get an email about this or if it’s only in comments.
And so all those settings are available as well. But right now there’s only me as a member in this particular group. So I can tag myself or I can tag everyone and everyone in the channel not necessarily in the group will be notified of this. And if I publish that post, you’ll see how that looks. So you get the post title and the content. If you click on it, it would open up and give more details. And then people can comment.
And again in the comment, you can tag people so that they get notified if you would
like. And I put my comment in there. Looks like that. And now when I come back out, you can see I’ve got no likes. I’ve got one comment. This is the person that commented. I can go and check out their profile. And you can see where the bio is and all of that. that you can see contributions from this person etc. All right, so that’s the discussion board and you can add multiple channels on here as well and you can put in a description.
You can give it like a special icon if you want. And this is where you can make it private or read-only. If it’s information you just want to give out to people, you might want to do the read-only so that they can’t comment back on it. Private channels is where you can start to differentiate maybe different levels of your community. If you pay at a certain level, you get access to this private channel or maybe you make something every some things all public and other things private.
And this is how you would add these different accesses within an automation when you go to set that up. So, I’m going to create this channel and you can see how it looks here with a heart. And then if I say, “Oh, I meant to make that private, not public.” I simply go back into my settings and I can actually make this private. You will see that this is not reversible, which is okay for the purposes of this. And now you will see the little lock on that channel.
And what that means is anyone who just signs up without special access to this will not be able to see the content in this particular channel.
Live Sessions
One of the new features that actually came out during LevelUp was this go live option. This is brand new. And if you click this button, there are a whole bunch of other settings. And it’s going to run you through all your settings, but you’re going to be able to say where do you want to post this to? When do you want to go live? Is this going to be streaming software or in a meeting room? So, you have all of these different settings.
You can give it a title, you can give it a description. So, you can actually host your meetings right in here now instead of having to use a third party. And then afterwards, this converts it just to a regular post if you keep this turned on. You can notify your members when you’re going live. Just like Facebook or LinkedIn notifies you when one of your one of the people you’re following goes live, which is pretty nice. In this case, I am going to cancel.
I’m not going to go live. All right. So, those are the channel settings. How to create a channel, what you can do in a channel. For the most part, let’s move on to learning.
Course Access and Pricing Options
So in the learning section, if I choose to add a course, I do have one course that we actually created in our previous video that I mentioned. So we can play with this and you can see here that you have some options. No matter what your course settings are individually, if some even if someone can go buy your course separately, you can set your course up as part of your community under these separate settings. So all members have access to this course.
This is just people join your community, they get this course right out of the gate, it will show up in the list. Or you could be that it unlocks at a certain level. So this is one place where you could use the gamification like, hey, unlock level five and get access to our newest course. You can actually make it for purchase. So let’s say on your website somebody can buy your course for $500, but if they’re a part of your community, it’s only 50 and maybe there’s even a trial.
There’s a time unlock. This is really good if you’re charging monthly for a membership because you want to drip content out on a regular basis. If you’re charging monthly, if you give people stuff all upfront, then what’s the incentive for them to keep paying you, right? So, this is an option. You could have 12 courses and have each one unlock after 30 days. So, every 30 days, they get a new course. It’s a 30-day, 60-day, 90-day, that sort of thing. And then there’s the private channel.
So, like I said, if you had different membership levels and someone was paying $10 a month and somebody else was paying $100 a month, maybe $100 a month, unlocks that private channel, well, this course is attached to that private channel. So, they also now get your course. And you can do the same thing with events, which I will show you in just a moment. But you can see here, we would choose our private channel and attach it to that. But at this point, why don’t we put this in here as a $50 course with a 7-day trial.
I like that. and we will add the course and we can see what that looks like. Oh, as I said, demo account, don’t have payments connected. Let’s try again. We’ll just put it in here as all members. All right, we’re going to add our course. And here it is. Now, it says right here, it’s free. You can click to open it. You’ll see how that looks. It looks just like the course that we created, all of our content. So, nice little added feature for communities to be able to add your courses right in there.
Working With Marketecs: Offers at Publication
I’m interrupting this video to make sure that there is no confusion about HighLevel or about how to work with me. If you want to try HighLevel but don’t want to waste months trying to figure it out, I have two very clear options for you to consider. If you’re looking to build an agency or a SaaS business, head over to Marketecs.com/highlevel by using our affiliate link, which costs you nothing. You will get the following bonuses. Our Marketecs Engine core snapshot. This is all of the features that we install in every new Marketecs Engine user account, and we’re giving it to you for free as an affiliate. our onboarding guides and access to our private community.
An invitation to join our weekly live office hours where I personally will answer questions and even share tips that I’ve learned throughout the week and I’m constantly learning. There is so many new features and things to learn in this industry as a whole, not to mention within the HighLevel platform. Plus, we’ll give you our additional templates, checklists, and migration guide. That’s option number one. Option two is if you are a business owner just looking to improve your own tech stack and you don’t want to do it alone.
You would like a trusted strategic partner in your corner that speaks the language, brings you time-tested automations, proven strategies, and up-to-date learning, then go to MarketecsEngine.com and book a consultation with me to learn more about our HighLevel agency, Marketecs Engine, and joining our ecosystem. I am also currently offering discounts on one-on-one consulting to any of our affiliates and HighLevel users. So whether you’re building an agency or building a business, pick your path and let’s drive results. Now, back to your regularly scheduled programming.
Events and Reminders
All right, next up on our list as we explore is events. With events, you can create your event here. I think it’s pretty self-explanatory. Put in your event title. You can choose a color. You choose a start time and an end time, your time zone. Then you can choose if this is going to be Zoom. You put in the Zoom link and give it a description. You do have to put all of this information in. But this recurring option is really nice.
We work with a lot of clients that do recurring events for people that are say in a mentorship program or have priority access to them somehow. And so maybe they have quarterly events or they have annual events even. So you could say repeats monthly on day five or the first Wednesday. So you can choose how you want this to show up, how many occurrences it’s going to have. Maybe it’s once a month for 12 months and then this gets shut down and you start another cohort for your membership, whatever that might be.
And we can hide the location from somebody who’s not an attendee. And then this is where you get your permissions. You can upload a fancy logo, but you don’t have to. Here you can say, is this available to all members? Members at a certain level again, so you can use your levels to unlock events, members of a certain course. So, if they’re already in the 3-day challenge, if your 3-day challenge was paid, let’s say it was $50, and you want them to have access to a live version, you would set up a 3-day, your recurring would be once every day for 3 days, and you would say everyone in the 3-day challenge or here’s your private channel.
So, again, you have that private channel for somebody paying at a different level, and you get to say they also, so they get this course, they get these events, they get etc, etc. And then you can set up reminders. So now you don’t have to build an automation to remind people about these upcoming events. And you can choose whether you want to hide or show attendees. Similar to a Facebook event when you’re setting one of those up. And now I get to choose is this paid or is this free.
Again, I don’t have payment connected, so I’m not going to choose paid, but you could make this 10, 20, $2,000 event even for people in your community. Or you could set it up as free. We’re going to keep it free and create. And now you can see there’s our event. This is a default image that shows up. I can delete it or I can edit it. I can also export the attendees and see the attendee list. And there’s the option to register.
When you click register, it says I’ve already RSVPd, but it would give you the option to add it to your calendar as well. The other thing you’ll notice is if you refresh your screen or come back that now the upcoming events show here on the left and you’ll be able to see past events as well. So you’ll see that list and you’ll see the calendar view. So those are the pretty much the top areas within this. And you’ll notice when I go back to discussion because I added that event, I also now have this piece here that’s showing me that an event is happening in 12 minutes which is nice.
So we have discussion with the channels. We have learning with courses. Then we have events that we can add. We covered the leaderboard. There’s a members list and then our about page.
Community Settings, Newsletters, and Links
So next I want to take a look at what’s over here on the right side. So these settings are going to drive quite a bit. If we open up the settings here within our group, we start out with details. So here’s the information we filled out on the very first screen. So we could change this pretty easily. All right. So I changed the group name. I changed the URL. Actually corrected that due to a typo. I updated the description. Now we have the option of is this going to be public or is it going to be private?
And I’ll show you what a private group looks like in a few minutes. Is it going to be accessible from the switcher? The switcher, it took me a minute to actually realize what this was. It’s the two little arrows right here at the top. So, if you belong to multiple groups, you’d be able to switch between multiple groups. And then, are you going to allow members to invite other members? So, these are all options just within this detail screen. I did make some edits, so I’m going to click update here.
Now, I go to subscription. It’s currently free. You can add a price. You could charge for this. And this is where I said it can be like a membership. You could say, is there going to be a 7-day trial? Are you going to charge $20 per month? Or is it going to be annually? Or maybe it’s not recurring at all. Maybe you just want a one-time fee for somebody to join this group. Newsletter. While this is not a brand new feature, this is a fairly new feature within the group settings.
I do love this feature. We were having to do the at everyone for every post that we were putting out per week in order to make sure that our community members were seeing the new content that we were sharing with them that they weren’t missing it because we all know that not everybody is signing into all of their communities where they really rely on a lot of those notifications. So, they added this newsletter feature. Currently, the settings on this are a little minimal.
However, it’s here and that’s a step in the right direction. You can set it up for daily, weekly, bi-weekly, or monthly. When you set it up, you actually do not have any options about which day and which time. So, even if you set it up weekly, that is the only setting that you have right now. The current setting, at least for those of us in Eastern Standard Time, is Mondays at 4:00 a.m. So, it may not be the most ideal time, but I will tell you the formatting, which also is not editable at the moment, the formatting is nice.
It shows you all the posts within the last week because in this case it’s weekly. It also shows you upcoming events all on one email. So you don’t have to email about every new thing that you’re doing every time you’re doing it, which to me was just a huge benefit. So in my community, I did turn on this weekly newsletter or community digest. I would like to see some of this come about to allow us to customize the email and the sending time, but again, it’s a step in the right direction.
Uh, next up on our settings is the branding. So, again, this is where we uploaded our images and you can change that. Then we have the theme. You can switch between dark and light mode. You can switch your coloring. So, you have some options there. You can also customize it and add your own colors. Membership questions. This is similar to again if you were joining a Facebook group. They might have those questions that you have to answer to approve the terms of service or say that you agree to whatever rules they have, no soliciting, etc.
Or maybe you just want to collect information about people. Where are you from? What is your primary niche? Whatever it might be. So this is where you can add membership questions. You add a question. You can do textbox select or multiple choice. When you save, you now have the question listed here. You can choose whether to actually turn them on or not. Um, and then you can edit and delete them. Gamification and rewards. So, this is where you can actually edit your levels.
You can change the level name. If you don’t want to call it level one, level two, and then under rewards, you can add a reward. You can say that somebody gets this at this level. Links. Links I actually think are pretty important. So, I will show you where these links show up. We’re going to add a link. So, I’m just going to add a link here. And then I’m going to keep this one. I’m not going to turn this one on to private.
You’ll see private links are only visible to group members. So, I’m going to add this one. And now I’m going to add one and make it private just so you’ll be able to see the difference there. All right. So, now we have two links. Reported content is basically exactly what it says here. It’s going to give you a list of reported content. There is an import for Skool group. So this is another platform, a different membership community building platform if you’re familiar with it.
So there is an option here to import if you wanted to convert from their platform to HighLevel. And then finally there’s collab or GoKollab and this is another bigger community of users multiple groups and you can actually have your group your community listed within GoKollab if you would like to. So, you would give it a link and you would say whether you want it to be discoverable or not discoverable within this larger community. You do have to have at least 10 members before it actually gets shown over there.
We’ll save our settings. And now we’re going to close out of this. And what you will notice here is my updated name. Still have a spelling error, but that’s okay. Updated description. And then you can see here testing link and private link. So, that is where your links are going to show up.
Member Navigation, Files, Chat, and Invitations
All right. Final things I will show you over here is as a user I have the option to switch to dark mode if I would like to. There’s also this option here to switch to different areas within the overall portal as I sort of showed you when we came into Marketecs Engine. There’s the client portal and there’s a couple more settings we’ll want to go over before you really start launching your communities. But within the portal is courses and communities and all of this.
So if you have it accessible to people and you do have the ability to turn these things off, you would find communities and you’ll see that it’s going to bring me right back here. You’re also going to find courses and it will take me out to just look at courses. There might be some other options depending on what you turn on. Then we have notifications and you can see here these are just things that have been happening in the community since I’ve been setting it up.
I have my profile and I can go to manage my account. From here I can edit my personal information and then you’re also able to see all the other information that has been made available to me in this portal. And again, we’ll go back over some of those settings. Now, if I click home, this is going to bring me out to the portal home. And so you can see join a group and take a course or options here. Those are going to take me to the communities or to the courses.
I can also see the test group that I was just in or the course that I currently had started. Now files would be if you had any uploaded files for me. So again where this is connected to the full CRM, you can actually upload files on a particular contact. If they have portal access, those files will show up in here. So there is some huge advantages to having this connected to your full CRM and having all those capabilities. If I go back into this group into this community that I was creating, I think the last thing that I have not really covered here is simply the chat.
There is a chat option here to start conversations with other members. I don’t have any members to start conversations with, but that is available. And if you’re building chat widgets, which I have another video on building chat widgets as well, you can actually choose to connect your chat widgets to your communities as well. So you could build a chat widget where people can ask questions and ask for help and people can also use the channels to ask questions and ask for help.
You could even have a help or a support channel. They just have to tag you. By adding the widget in the bottom right corner, you have control where you can say if a message comes through this widget, send me an email or send me a text message. So you can use the automations to have control of that. Plus, it comes up as a popup as I discussed in that widget building video. It seems like we don’t need another way for people to contact us, but surprisingly sometimes we do.
So, this is pretty much how to build a group, how to build a community, and then you can invite members. You have your group link that you can just send out to people. You can also invite people via name and email, and you can decide if you want to give them admin privileges. So, it’s pretty easy to invite people. Then they just set up their own username and password, come in, put their picture in, and they have access just like what we did earlier.
A Real Marketecs Community Example
Now, I want to show you what a community looks like with some actual content in it. This is our HighLevel community that we’ve just started building this out. We’re providing access to people that use our affiliate link with some of our tutorials as well as learning guides and all of those sort of things. So, you would have access to us through this community. Right now, I am signed into this. You’re seeing my view as a signed user. And you can see we have multiple channels.
We have announcements, text and tips, marketing, and tech support. They’re all separate channels. And this is a pinned comment. So, you can choose to pin or unpin a comment and leave it up at the top for a featured post. Again, if I go back to home, you’re just going to see the overall channel. I can go live in this as I was showing you under learning. You’ll see an example here of two different courses I’ve added. The onboarding guidance setup is free.
And then I do have a highly discounted version of our 3-day implementation challenge. And this is exactly that example I was telling you. If someone were to buy this on their own, it would be about $500. I’m offering it for just 10% of that if you’re in our community, which means you used our affiliate link. Now, for those people that signed up with Marketecs Engine directly, not using our affiliate link, you get this course for free. So, those different levels of things that I’m offering for support.
And then if you go to events, you will see that we have live weekly office hours every week. And we offer this both to our Marketecs Engine users and those that use our affiliate link. So, this is how you would get access to that information, too.
Signed-In and Logged-Out Views
Now, over on the about page, this over on the about page, this was one of the things I wanted to show you in terms of what it looks like when someone is signed in versus not signed in an active community. This is a private group. So, on this about page, I did upload a little video describing why you would want to be in this community, why you would want to sign up for HighLevel. And then I just put two images. These are just still images showing that there’s two options to sign up for HighLevel.
I also put an about description here. And you’ll notice I’ve got what, two, four, six, seven different links here, right, for members that are in the community. Now, this is what it looks like when I’m signed in. What I’m going to do is I’m going to flip to another browser and show you what it looks like when I’m not signed in. Here is what it looks like if I was not signed in. So, this is a browser I’m not signed in on, and you can see that I can’t get to discussions.
I can’t get to learning events. I can’t see any of this information. The only screen if you want to that I can see is the about screen and the video and images that were uploaded. And that’s why those are important. They may not be important once somebody gets into your community, but they’re important for those people that have not yet gotten into your community. And you can see that I’m charging $500 one time to join this community. And you’ll also notice that instead of the multiple links that we had here on the side, you now only have one link.
You don’t have all of those other links. you only have access to our YouTube channel. So, now switching back to what it actually looks like when somebody is signed in, you will notice that I did provide all the GHL links that I’m aware of that I find useful as well as the YouTube channel. We even have an AI support center which is actually a custom GPT and we have access to a special calendar with a code to get 50% off for private meetings with us and support.
So, this is the kind of thing that you can do with a community. Even if you’re not a consultant or a coach or you don’t have a ton of courses, you can still provide value to people through a private portal.
Portal Settings, Invitations, and Magic Links
All right, so speaking of the portal, let’s go back and look at the other settings real quick. Here under the client portal dashboard, you will see that I have my client portal URL, which you can change. You can connect a subdomain and make that look really pretty. And you’ll notice I did that with the Marketecs one. So, it’s [spoken portal URL unclear], right? So, you don’t have to have the ugly URL. Um, some other things you can do here, generate a magic link.
A magic link is basically a link that someone can use to sign in without having to use their password. So, if somebody says, “I forgot my password.” You can generate them a magic link and send them an email so that they can get in super quick and easy. And you can send it to their contact. who can send it to specifically to the courses or to the community or wherever you want to send it to as well. Next, we have invite.
So, this is where you can choose somebody already in the system to invite them. And then we have the login email, which again, somebody says that they forgot their password, whatever it might be, you can send them their email to log in. Having the ability to send people that information is very important because it is probably one of the banees of the existence of having a community is technical issues. I can’t get in. I lost my password is very common and having an easy way to send that along or generate a magic link saves you a ton of time.
Now, if we go into settings, this is where you would set up your domain. You would connect your custom domain. And we do have a whole another video on connecting custom domains, so we’re not going to go over that today. You would also brand your portal, and this is where you can upload more content and images and set your colors. App permissions. This is where I was saying you can decide what you’re going to give people access to. Maybe you only want courses and communities.
You don’t want you’re not setting up an affiliate. You’re not providing billing and subscription, which if you’re doing paid courses and paid memberships, I probably would keep billing and subscription, but that’s up to you. If you don’t want them to see contracts that they’ve signed or estimates that you’ve shared, you can turn all of this off. even the shared files that I mentioned, which I think are pretty cool, but maybe you don’t want those to be shared. You can decide what’s going to go there.
You can also decide that little home icon. Where is that going? Is that going to communities? To courses? Is it going to that homepage that I showed you, which honestly could maybe be a little bit confusing if your primary use of the portal really is communities? I might recommend you send people there. All right, so that’s the dashboard and the settings. We did already cover courses. We’re going to go to communities and you’re going to see our group is now available for me to get in as an admin.
I actually don’t have to go to the sign-in page because I can just click this login button and it brings me right into that group I created. I tend to find that is a little bit faster and easier way to get in there and you can see I’m logged in. Then under group settings, it brings us back to our domain setup. So really it brought us into our settings and our domain setup. Just a different way to get there. The settings here is really the robust piece you want to look at.
Credentials really has more to do with your online courses. And then the GoKollab marketplace, which I briefly mentioned in the community settings. There’s more of a description of that here. You can actually go check it out and you can see the communities and courses that you have selected.
Closing Thoughts and Use Cases
All right, that is our overview of the groups, community courses, whatever you want to call them in HighLevel. I hope you found that valuable. I hope that helps you decide whether you want to use those features or better yet how you might use those features or uplevel your current community settings.
Maybe you never thought you needed a client portal and you just saw some features in there that are giving you some ideas. I hope it’s helpful. And keep in mind a lot of those different features within there are also connectable through your workflows, can trigger emails, can trigger tagging, can even trigger different purchase actions.
If this was helpful, I hope you will like, share, subscribe, leave a comment if you have a question or another use or use case of how you’re incorporating the communities and groups into your business. Thanks.
Want help designing a portal your clients can navigate and your team can maintain? Book a consultation with Marketecs to plan your client access, resources, and onboarding.